
In this post, I will walkthrough the process of containerizing a simple Node.js app using Docker then deploying the Docker image to Kubernetes.
Requirements:
Once you have Docker installed, keep it running on the background!
First, lets look at our app.js file.
const express = require('express');
const app = express();

app.listen(8000, () => {
    console.log('Listening on Port 8000');
});

app.get('/', (req, res) => {
    console.log('sucess');
    res.send('Hello World!');
});
This is a simple Node.js app built using express.
For Node to run, we need a package.json file that includes all our dependencies. We can create this by using npm init -y
{
    "name": "nodejs-app",
    "version": "1.0.0",
    "description": "Test Node JS App",
    "main": "app.js",
    "scripts": {
        "test": "echo \"Error: no test specified\" && exit 1"
    },
    "author": "Nitish",
    "license": "MIT",
    "dependencies": {
        "express": "^4.17.1"
    }
}
Now, lets move onto creating a Dockerfile. It doesn't have any ending extension, only the file named as Dockerfile with the following contents.
FROM node:lts

WORKDIR /usr/src/app

COPY package*.json ./

RUN npm install

COPY . .

EXPOSE 8000

CMD ["node", "app.js"]
Now, we have everything that we need, in order to docerize our simple node app.
In order to proceed further, make sure, that your docker is up & running, along with Kubernetes.
Now, lets build the docker image for our app.
docker build . -t simple-app
This command will build and docker image for our app utilizing the contents from our package.json file.
docker run -p 8080:8000 --name app simple-app
The above command will provide the name app to our container and serve it on port 8000.
In order to find which port is our docker image running on, we can use docker port command.
docker port app
Now, if you open your browser and go to localhost:8000 then you will see the response from our app.js file.
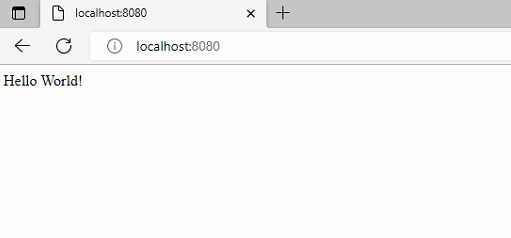
Congratulations! You have successfully dockerized your app.
Moving from Docker to Kubernetes
Now, lets move on to the part where we have been waiting to deploy our docker image to kubernetes.
First, you need to validate and upload your docker image to Docker Hub .
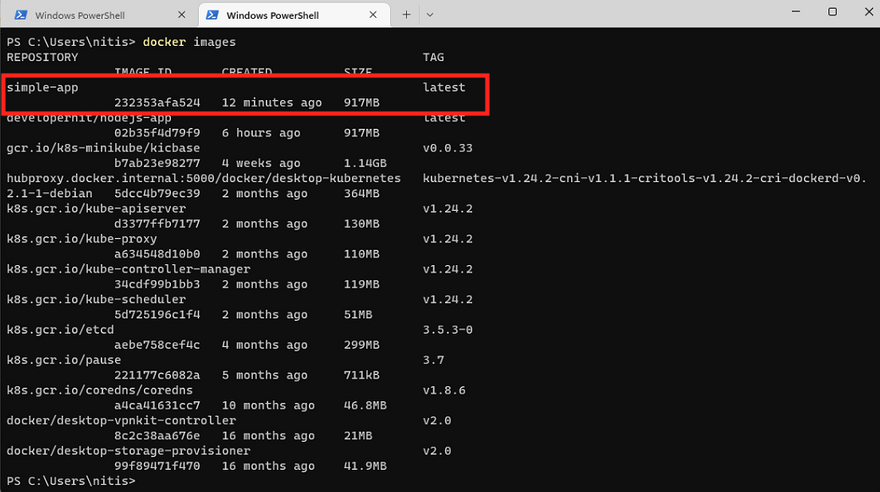
Let's validate the image that is created in Docker with the following command:
docker images
Now, that we have validated it, we can run the following command to login to docker.
docker login
Once you have logged in, you can now push your docker image using:
docker push
If you run into issue, then make sure you tag your image.
example: docker tag <image ID> <your repository on docker hub name>
docker tag 232353afa524 developernit/simple-app
then run
docker push developernit/simple-app
Now that we have pushed our image to docker hub, we need to start the container from the image!
docker container run -d -it --name simpleappcontainer developernit/simple-app:latest
Until now we were working locally, but now we will start moving to Kubernetes using our image in Docker Hub.
Kubernetes - a pilot on a ship of containers
One of the major step towards using Kubernetes is to create a manifest file, which ends with .yaml extension and it has a lot of the components that we will go through.
First, let's create a simple manifest file named appmanifest.yaml with the following contents:
apiVersion: v1
kind: Pod
metadata:
  name: simple-app-pod
  labels:
    app: simple-app-pod
    tier: pod
spec:
  containers:
  - name: simple-container
    image: developernit/simple-app:latest
    imagePullPolicy: Always
    ports:
    - containerPort: 6000
      protocol: TCP
What does this manifest file do?
Kubernetes uses this manifest file to create, modify and delete Kubernetes resources such as pods, deployments, services, etc.
The root level properties of the manifest files are apiVersion, kind, metadata and spec.
apiVersion
This is the version of the kubernetes API that we are using to create the object. Since we are working with pods, we will set the apiVersion as v1.
Pod is a collection of containers that can run on a host.
kind
It refers to the type of object we are trying to create and in our case, we are trying to create a Pod.
metadata --> also called namespaces
It contains information about the object, such as its name, labels, etc.
In our case, we are naming our pod as simple-app-pod
spec
This is the last section in our manifest file and it provides additional information to kubernetes regarding that object.
In our case, we are only adding a single item on spec as containers because we will only ahve a single container in the pod.
- imagePullPolicy:
IfNotPresent,Always&Never
IfNotPresent -> only pull image if its not present locally
Always -> everytime the kubelet launches a container, pull the image and use that image to launch the container
Never -> does not try fetching the image
protocol: -> Kubernetes supports TCP by default, but also support UDP and SCTP protocols. UDP is chosen for time-sensitive applications like gaming, playing videos and DNS lookups.
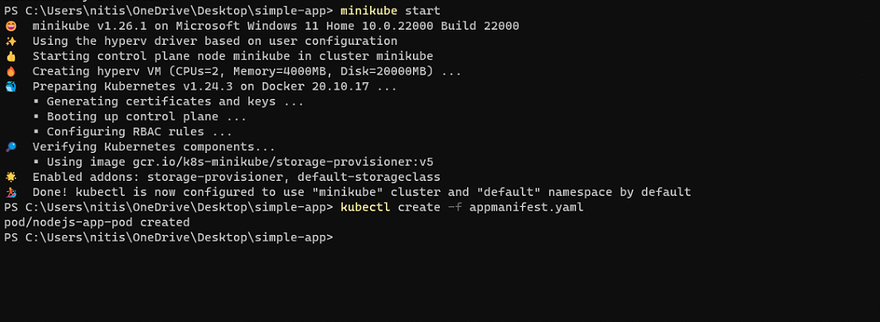
Now, lets create a Pod using kubectl command.
kubectl create -f appmanifest.yaml
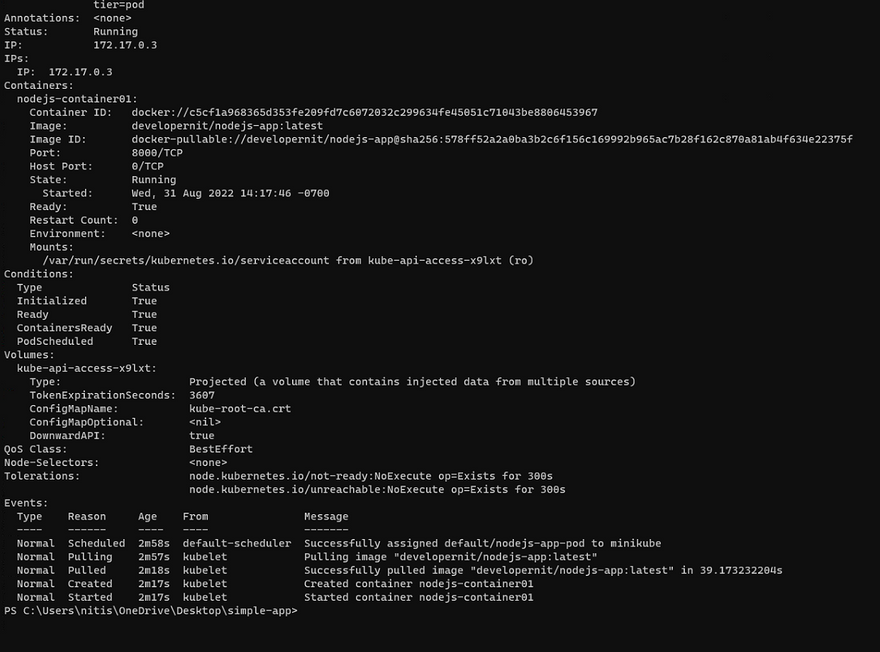
To get more status and more details on our newly created Pod use:
kubectl get pods
kubectl get pods/<pod name>
kubectl describe pods/<pod-name>
Now, lets run the command to open the dashboard in our browser:
minikube dashboard
And visit Workloads -> Pods
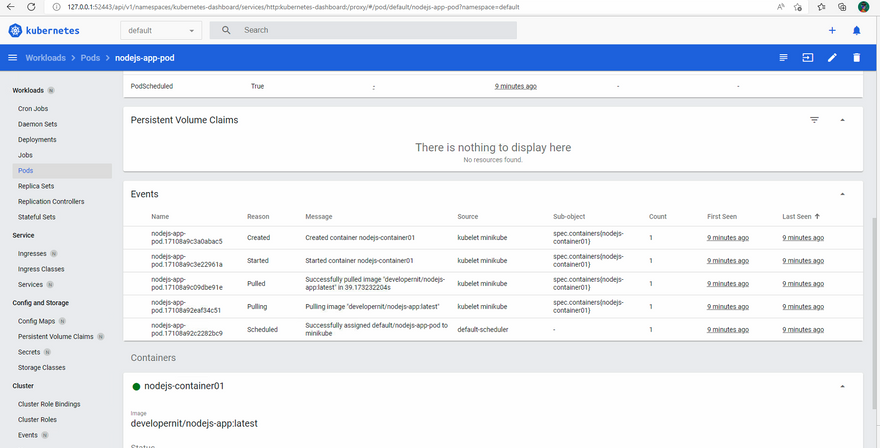
And now you can see your Pod


Top comments (1)
Nicely written, thank you for showing both approach docker and kubernetes to deploy nodejs :).