We now have enough background to start this POC. This is a final blog post in this series that demonstrates how to install an OpenShift cluster using the UPI technique without the need for an external load balancer. We will deploy both Keepalived and HAProxy components in the same cluster, which will eliminate the requirement for an external load balancer and CoreDNS which will eliminate external DNS requirements.
Note: Please remember that this is not an officially supported solution and is not recommended for production-grade clusters.
There are some pre-requisite to proceed further.
- Knowledge and access to OpenStack Environment, we built the infrastructure with an Openstack TripleO cluster. All scripts used here are tested using OpenStack, but it should be possible to reproduce it with any other platform (Baremetal and virtual machine).
- Access to cloud.redhat.com
- Knowledge and access to Ansible and
ansible-playbookcli
Download and install openshift-install, oc and kubectl
- If you are in Linux, get these tools as follows,
# openshift-install
curl -LO https://mirror.openshift.com/pub/openshift-v4/clients/ocp/4.10.13/openshift-install-linux-4.10.13.tar.gz
tar -zxvf openshift-install-linux-4.10.13.tar.gz
rm -rf openshift-install-linux-4.10.13.tar.gz
mv openshift-install /usr/local/bin/openshift-install

#oc, kubectl
curl -LO https://mirror.openshift.com/pub/openshift-v4/clients/ocp/4.10.13/openshift-client-linux-4.10.13.tar.gz
tar -zxvf openshift-client-linux-4.10.13.tar.gz
rm -rf openshift-client-linux-4.10.13.tar.gz
mv kubectl /usr/local/bin/kubectl
mv oc /usr/local/bin/oc
- If you are in Mac, you can get these tools as follows,
# openshift-install
curl -LO https://mirror.openshift.com/pub/openshift-v4/clients/ocp/4.10.13/openshift-install-mac-4.10.13.tar.gz
tar -zxvf openshift-install-mac-4.10.13.tar.gz
rm -rf openshift-install-mac-4.10.13.tar.gz
mv openshift-install /usr/local/bin/openshift-install
#oc, kubectl
curl -LO https://mirror.openshift.com/pub/openshift-v4/clients/ocp/4.10.13/openshift-client-mac-4.10.13.tar.gz
tar -zxvf openshift-client-mac-4.10.13.tar.gz
rm -rf openshift-client-mac-4.10.13.tar.gz
mv kubectl /usr/local/bin/kubectl
mv oc /usr/local/bin/oc
Verify you can access the utilities,
bpandey@Balkrishnas-MacBook-Pro Desktop % oc version
Client Version: 4.10.13
bpandey@Balkrishnas-MacBook-Pro Desktop % kubectl version
Client Version: version.Info{Major:"1", Minor:"23", GitVersion:"v1.23.0", GitCommit:"09f825e2ac8ddedf8bbc6bc82ffc5520560788a0", GitTreeState:"clean", BuildDate:"2022-04-29T17:55:28Z", GoVersion:"go1.17.5", Compiler:"gc", Platform:"darwin/amd64"}
The connection to the server localhost:8080 was refused - did you specify the right host or port?
bpandey@Balkrishnas-MacBook-Pro Desktop % openshift-install version
openshift-install 4.10.13
built from commit ed025ee9ca62dd3fb7f7f7eaff9c90fd1a011fe2
release image quay.io/openshift-release-dev/ocp-release@sha256:4f516616baed3cf84585e753359f7ef2153ae139c2e80e0191902fbd073c4143
release architecture amd64
Download the RCHOS image and create an OpenStack image
First, we'll need a base OS image; I'll use the RCHOS image for our POC. You are welcome to use the ISO image you created.
curl -LO https://mirror.openshift.com/pub/openshift-v4/x86_64/dependencies/rhcos/4.10/4.10.3/rhcos-openstack.x86_64.qcow2.gz
gzip -d rhcos-openstack.x86_64.qcow2.gz
rm -rf rhcos-openstack.x86_64.qcow2.gz
openstack image create --container-format=bare --disk-format=qcow2 --file rhcos-openstack.x86_64.qcow2 rhcos-openstack.4.10.3.x86_64.qcow2
Clone git repository in your local machine
All the manifest required for this project is located in this repository. Please notice that some hard-coded values (network config, static IPs) are only valid in my labs; make sure to replace those in your case.
git clone https://github.com/pandeybk/hyperconverged-openshift-upi.git
If you expand this project you will see following tree structure,
.
├── README.md
├── bootstrap
│   └── fakeroot
│       └── etc
│           ├── kubernetes
│           │   ├── manifests
│           │   │   ├── coredns.yaml
│           │   │   └── keepalived.yaml
│           │   └── static-pod-resources
│           │       ├── coredns
│           │       │   └── Corefile.tmpl
│           │       └── keepalived
│           │           └── keepalived.conf.tmpl
│           └── rc.d
│               └── rc.local
├── install-dir
│   ├── bootstrap.yaml
│   ├── common.yaml
│   ├── control-plane.yaml
│   ├── down-bootstrap.yaml
│   ├── down-control-plane.yaml
│   ├── down-ports.yaml
│   ├── down-security-groups.yaml
│   ├── install-config.yaml
│   ├── inventory.yaml
│   ├── ports.yaml
│   └── security-groups.yaml
├── master0
│   └── fakeroot
│       └── etc
│           ├── kubernetes
│           │   ├── manifests
│           │   │   ├── coredns.yaml
│           │   │   ├── haproxy.yaml
│           │   │   ├── keepalived.yaml
│           │   │   └── mdns-publisher.yaml
│           │   └── static-pod-resources
│           │       ├── coredns
│           │       │   └── Corefile.tmpl
│           │       ├── haproxy
│           │       │   └── haproxy.cfg.tmpl
│           │       ├── keepalived
│           │       │   ├── keepalived.conf.tmpl
│           │       │   └── scripts
│           │       │       ├── Readme.md
│           │       │       ├── chk_ocp_script.sh.tmpl
│           │       │       └── chk_ocp_script_both.sh.tmpl
│           │       └── mdns
│           │           └── config.hcl.tmpl
│           └── sysconfig
│               └── network-scripts
│                   └── ifcfg-ens3
├── master1
...
└── master2
...

49 directories, 53 files
Generate initial ignition config
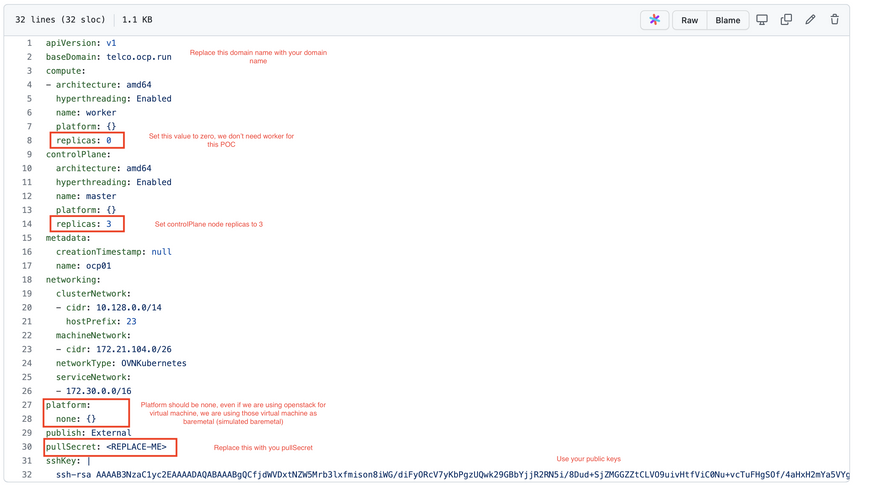
The openshift-install toolkit is a set of tools used to deploy and manage OpenShift clusters. We will use the openshift-install binary to generate the initial ignition config file. To develop an initial ignition config file, run the following command and follow the instructions, or use the one available on Github.
openshift-install create install-config --dir=install-dir
I will use the one available on Github. Make sure to adjust the following if you are using this file,
Now you can run the following command to generate the initial ignition config
openshift-install create manifests --dir=install-dir
openshift-install create ignition-configs --dir=install-dir
Modify bootstrap ignition config
To Modify bootstrap ignition configs, let's create a python file _bootstrap-ignition.py with the following content.
import base64
import json
import os

with open('./install-dir/bootstrap.ign', 'r') as f:
   ignition = json.load(f)

files = ignition['storage'].get('files', [])

infra_id = os.environ.get('INFRA_ID', 'openshift').encode()
hostname_b64 = base64.standard_b64encode(infra_id + b'-bootstrap\n').decode().strip()
files.append(
{
   'path': '/etc/hostname',
   'mode': 420,
   'contents': {
     'source': 'data:text/plain;charset=utf-8;base64,' + hostname_b64
   }
})

ca_cert_path = os.environ.get('OS_CACERT', '')
if ca_cert_path:
   with open(ca_cert_path, 'r') as f:
     ca_cert = f.read().encode()
     ca_cert_b64 = base64.standard_b64encode(ca_cert).decode().strip()

   files.append(
   {
     'path': '/opt/openshift/tls/cloud-ca-cert.pem',
     'mode': 420,
     'contents': {
       'source': 'data:text/plain;charset=utf-8;base64,' + ca_cert_b64
     }
   })

ignition['storage']['files'] = files;

with open('./install-dir/bootstrap.ign', 'w') as f:
   json.dump(ignition, f)
And use the following scripts to generate the custom ignition file.
export INFRA_ID=$(jq -r .infraID install-dir/metadata.json)
python _bootstrap-ignition.py
filetranspile -i install-dir/bootstrap.ign -f bootstrap/fakeroot -o install-dir/custom-bootstrap.ign
Here we are usingfiletranspile tool to generate this ignition config.
Modify Controller ignition config
To modify the master ignition config, run the following command.
export INFRA_ID=$(jq -r .infraID install-dir/metadata.json)

for index in $(seq 0 2); do
    MASTER_HOSTNAME="$INFRA_ID-master-$index\n"
    python -c "import base64, json, sys;
ignition = json.load(sys.stdin);
storage = ignition.get('storage', {});
files = storage.get('files', []);
files.append({'path': '/etc/hostname', 'mode': 420, 'contents': {'source': 'data:text/plain;charset=utf-8;base64,' + base64.standard_b64encode(b'$MASTER_HOSTNAME').decode().strip(), 'verification': {}}, 'filesystem': 'root'});
files.append({'path': '/etc/mdns/hostname', 'mode': 420, 'contents': {'source': 'data:text/plain;charset=utf-8;base64,' + base64.standard_b64encode(b'$MASTER_HOSTNAME').decode().strip(), 'verification': {}}, 'filesystem': 'root'});
storage['files'] = files;
ignition['storage'] = storage
json.dump(ignition, sys.stdout)" <install-dir/master.ign > "install-dir/$INFRA_ID-master-$index-ignition.json"

done

docker run --rm -ti --volume `pwd`:/srv:z filetranspile:latest -i install-dir/$INFRA_ID-master-0-ignition.json -f master0/fakeroot  -o install-dir/$INFRA_ID-master-0-ignition.json
docker run --rm -ti --volume `pwd`:/srv:z filetranspile:latest -i install-dir/$INFRA_ID-master-1-ignition.json -f master1/fakeroot  -o install-dir/$INFRA_ID-master-1-ignition.json
docker run --rm -ti --volume `pwd`:/srv:z filetranspile:latest -i install-dir/$INFRA_ID-master-2-ignition.json -f master2/fakeroot  -o install-dir/$INFRA_ID-master-2-ignition.json
Upload ignition config to Openstack Object Storage
Upload bootstrap ignition config to Openstack using the following script. Technically, you can host this ignition configuration on any webserver.
export INFRA_ID=$(jq -r .infraID install-dir/metadata.json)
export CONTAINER_NAME="ocp30-ignition"
export CERTIFICATE=$(cat ~/.openstack/nfvi.crt | base64 )
export CONTAINER_TENANT_ID=$(openstack container show $CONTAINER_NAME -f json | jq -r .account)
export SWIFT_URL_TEMP=$(openstack endpoint list -f json | jq -r '.[] | select((."Service Name"=="swift") and (."Interface"=="public")) | .URL')
export SWIFT_URL=$(echo $SWIFT_URL_TEMP | sed -r "s/AUTH_\%\(tenant_id\)s/$CONTAINER_TENANT_ID/g")
export TOKEN=$(openstack token issue -c id -f value)

openstack object create --name $INFRA_ID-bootstrap.ign $CONTAINER_NAME install-dir/custom-bootstrap.ign

cat <<EOF > install-dir/$INFRA_ID-bootstrap-ignition.json
{
  "ignition": {
    "config": {
      "merge": [{
        "source": "${SWIFT_URL}/${CONTAINER_NAME}/${INFRA_ID}-bootstrap.ign",
        "httpHeaders": [{
          "name": "X-Auth-Token",
          "value": "${TOKEN}"
        }]
      }]
    },
    "security": {
      "tls": {
        "certificateAuthorities": [{
          "source": "data:text/plain;charset=utf-8;base64,${CERTIFICATE}"
        }]
      }
    },
    "version": "3.1.0"
  }
}
EOF
Create Cluster
Finally, create the cluster using the following script,
export INFRA_ID=$(jq -r .infraID install-dir/metadata.json)

cd install-dir
ansible-playbook -i inventory.yaml security-groups.yaml
ansible-playbook -i inventory.yaml bootstrap.yaml
ansible-playbook -i inventory.yaml control-plane.yaml


Top comments (0)