
In this tutorial, we’ll deploy a containerized Django application with Kubernetes (K8s).
Step 1 — Containerize our Application with Docker
Let’s create a new Django application:
$django-admin startproject django-k8s
Navigate to the django-k8s directory:
$cd django-k8s
After that, we need to create a new Dockerfile which Docker will use to build our container image:
$vim Dockerfile
Dockerfile:
FROM ubuntu:20.04
RUN apt-get update && apt-get install -y tzdata && apt install -y python3.8 python3-pip
RUN apt install python3-dev libpq-dev nginx -y
RUN pip install django gunicorn psycopg2
ADD . /app
WORKDIR /app
EXPOSE 8000
CMD ["gunicorn", "--bind", ":8000", "--workers", "3", "django-k8s.wsgi"]
This Dockerfile uses the official Ubuntu 20.04 docker image as a base and installs Django, Gunicorn, Python3.8. Finally, it exposes that port 8000 will be used to accept incoming container connections, and runs gunicorn with 3 workers and listening on port 8000.
Now, let’s build our image using docker build:
$docker build -t django-k8s.
We named the image django-k8s using the -t flag and pass in the current directory as a build context, the set of files to reference when containerize the image.
After Docker builds and tags the image, list available images using docker images:
$docker images
You should see the django-k8s image listed:
REPOSITORY IMAGE ID CREATED SIZE
django-k8s latest
In the next step, we will run the configured container locally.
Step 2 — Creating the Database Schema
With the container built and configured, use docker run to override the CMD set in the Dockerfile and create the database schema using the manage.py makemigrations and manage.py migrate commands
$docker run -i -t django-k8s sh
This will provide you with a shell prompt inside of the running container
#python3 manage.py makemigrations && python3 manage.py migrate
If you’re running this you should see:
Output
Operations to perform:
  Apply all migrations: admin, auth, contenttypes, sessions
Running migrations:
  Applying contenttypes.0001_initial... OK
  Applying auth.0001_initial... OK
  Applying admin.0001_initial... OK
  Applying admin.0002_logentry_remove_auto_add... OK
  Applying admin.0003_logentry_add_action_flag_choices... OK
  Applying contenttypes.0002_remove_content_type_name... OK
  Applying auth.0002_alter_permission_name_max_length... OK
  Applying auth.0003_alter_user_email_max_length... OK
  Applying auth.0004_alter_user_username_opts... OK
  Applying auth.0005_alter_user_last_login_null... OK
  Applying auth.0006_require_contenttypes_0002... OK
  Applying auth.0007_alter_validators_add_error_messages... OK
  Applying auth.0008_alter_user_username_max_length... OK
  Applying auth.0009_alter_user_last_name_max_length... OK
  Applying auth.0010_alter_group_name_max_length... OK
  Applying auth.0011_update_proxy_permissions... OK
  Applying auth.0012_alter_user_first_name_max_length... OK
  Applying sessions.0001_initial... OK
This shows that the database schema has successfully been created.
#python3 manage.py createsuperuser
Enter a username, email address, and password for your superuser, and after creating the superuser, hit CTRL+D to quit the container and kill it.
Now let’s run our docker container .
$docker run -p 80:8000 django-k8s
you should see :
Output
[2022-04-18 06:40:37 +0000] [1] [INFO] Starting gunicorn 20.1.0
[2022-04-18 06:40:37 +0000] [1] [INFO] Listening at: http://0.0.0.0:8000 (1)
[2022-04-18 06:40:37 +0000] [1] [INFO] Using worker: sync
[2022-04-18 06:40:37 +0000] [9] [INFO] Booting worker with pid: 9
[2022-04-18 06:40:37 +0000] [10] [INFO] Booting worker with pid: 10
[2022-04-18 06:40:37 +0000] [11] [INFO] Booting worker with pid: 11
Here, we run the default command defined in the Dockerfile, gunicorn --bind :8000 --workers 3 django-k8s.wsgi:application, and expose container port 8000 so that port 80 on your local machine gets mapped to port 8000 of the django-k8s container.
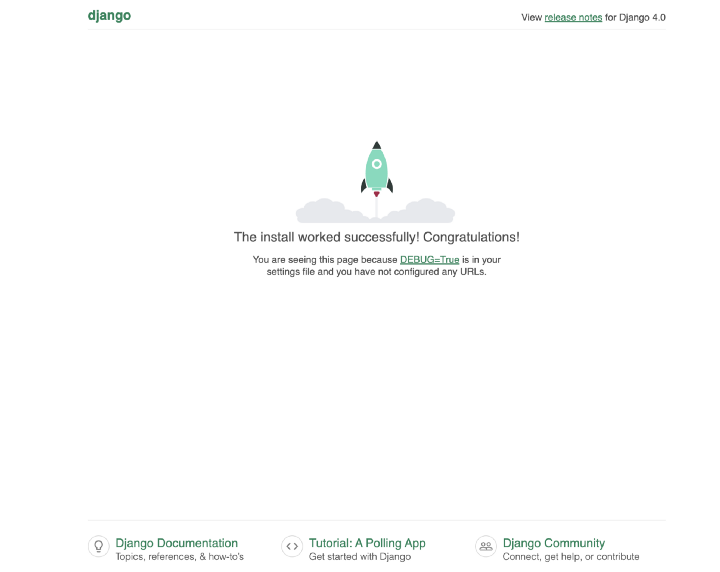
You should now be able to navigate to the django-k8s app using your web browser by typing http://localhost in the URL bar.
Navigate to http://localhost to see the djangoapp:
When you are finished exploring, hit CTRL+C in the terminal window running the Docker container to kill the container.
Step 3 — Pushing the Django App Image to Docker Hub
To deploy your application to Kubernetes, your app image must be uploaded to a docker hub registry. Kubernetes will retrieve the application image from its repository and then deploy it to your cluster.
In this tutorial, we’ll push a Django image to the public Docker Hub repository.
Begin by logging in to Docker Hub on your local machine:
$docker login
Enter your Docker Hub username and password to login. After you successfully logged in you should see:
Output
Login Succeeded
The Django image has the django-k8s:latest tag. To push it to your Docker Hub repository, re-tag the image with your Docker Hub username and repo name:
$docker tag django-k8s:latest your_dockerhub_username/your_dockerhub_repo_name:latest
Push the image to the repo:
$docker pushyour_dockerhub_username/your_dockerhub_repo_name:latest
You’ll see some output that updates as image layers are pushed to Docker Hub.
Now that your image is available to Kubernetes on Docker Hub, you can begin deploy it in your cluster.
Step 4 — Deploy the Django App using a Deployment
In this step you’ll create a Deployment for your Django app. A Kubernetes Deployment is a controller that can be used to manage stateless applications in your cluster. A controller is a control loop that regulates workloads by scaling them up or down. Controllers also restart and clear out failed containers.
Deployments control one or more Pods, the smallest deployable unit in a Kubernetes cluster. Pods enclose one or more containers.
Begin by opening a file called django-deployment.yaml in your favorite editor:
$vim django-deployment.yaml
Paste in the following Deployment manifest:
apiVersion: apps/v1
kind: Deployment
metadata:
  name: django-app
  labels:
    app: django
spec:
  replicas: 3
  selector:
    matchLabels:
      app: django
  template:
    metadata:
      labels:
        app: django
    spec:
      containers:
        - image: your_dockerhub_username/app_repo_name:latest
          name: django
          ports:
            - containerPort: 8000
              name: gunicorn
Fill in the appropriate container image name, referencing the Django project image you pushed to Docker Hub in Step 2.
Here we define a Kubernetes Deployment called django-app and label it with the key-value pair app: django. We specify that we’d like to run three replicas of the Pod defined below the template field.
Finally, we expose containerPort 8000 and name it gunicorn.
When you’re done editing the file, save and close it.
Create the Deployment in your cluster using kubectl apply -f:
$kubectl apply -f django-deployment.yaml
you should see:
deployment.apps/django-app created
Check that the Deployment rolled out correctly using kubectl get:
$kubectl get deploy django-app
Output:

NAME        READY   UP-TO-DATE   AVAILABLE   AGE
django-app   3/3     3           3          3m21s
If you encounter an error or something isn’t quite working, you can use kubectl describe to inspect the failed Deployment:
$kubectl describe deplo
You can inspect the three Pods using kubectl get pod:
$kubectl get pod
Output:

NAME                         READY   STATUS    RESTARTS   AGE
django-app-7c55868755-4wglz   1/1     Running   0             2m5s
django-app-7c55868755-7tpjd   1/1     Running   0             2m5s
django-app-7c55868755-9s4s8   1/1     Running   0             2m5s
Three replicas of your Django app are now up and running in the cluster. To access the app, you need to create a Kubernetes Service, which we’ll do next.
Step 5 — Allowing External Access using a Service
In this step, you’ll create a Service for your Django app. A Kubernetes Service is an abstraction that allows you to expose a set of running Pods as a network service. Using a Service you can create a stable endpoint for your app that does not change as Pods die and are recreated.
Creating a file called django-svc.yaml using your favorite editor:
$vim django-svc.yaml
Paste in the following Service manifest:
apiVersion: v1
kind: Service
metadata:
  name: django
  labels:
    app: django
spec:
  type: NodePort
  selector:
    app: django
  ports:
    - port: 8000
      targetPort: 8000
Here we create a NodePort Service called django and give it the app: django label. We then select backend Pods with the app: django label and target their 8000 ports.
When you’re done editing the file, save and close it.
Roll out the Service using kubectl apply:
$kubectl apply -f django-svc.yaml
Output:

service/django created
Confirm that your Service was created using kubectl get svc:
$kubectl get svc django
Output:

NAME    TYPE       CLUSTER-IP       EXTERNAL-IP   PORT(S)          AGE
django       NodePort    10.107.211.249   <none>        8000:30306/TCP   15s
This output shows the Service’s cluster-internal IP and NodePort (30306). To connect to the service, we need the external IP addresses for our cluster nodes:
In your web browser, visit your Django app using http://localhost:30306
You should see the same Django app interface that you accessed locally in Step 1.
Conclusion
In this tutorial, you deployed a scalable Django app into a Kubernetes cluster. Running Pods can be quickly scaled up or down using the replicas field in the django-app Deployment manifest.
git source code here.


Top comments (0)