Replicate MySQL Database: 2 Easy Methods
One of the biggest challenges that most organizations face today is ensuring high availability and accessibility of data over the complex set of networks they have in place. Having around-the-clock and real-time access to crucial business data can help organizations carry out processes seamlessly and maintain a steady revenue flow. Organizations, thus have a growing need to scale their systems & provide the support for accessing data seamlessly. This article focuses on how to Replicate MySQL Database.
What is MySQL?
MySQL is one of the most popular, widely-used and robust open-source RDBMS (Relational Database Management System), made available free of cost under the GNU public license, also known as the premium proprietary version. It allows users to leverage SQL (Structured Query Language) based queries to access, add and remove data from their desired database.
Michael Widenius originally developed MySQL at MySQL AB, a Swedish-based company, later acquired by Sun Microsystems and then by Oracle. Many prominent organizations such as Facebook, YouTube, Flickr, etc. use MySQL to manage their data needs.
Key Features of MySQL
- Secure: MySQL provides users with enterprise-grade security functionalities, allowing only authorized personnel to access the data.
- Compatible: MySQL houses support for all significant modern platforms and operating systems such as Windows, Linux, Unix, etc.
- Scalable: It has a highly scalable & robust architecture that ensures high performance, even when working with complex queries and large volumes of data.
- Smooth Experience: MySQL is effortless to download, install, easy to use, and is also available free of cost.
What is Replication in MySQL?
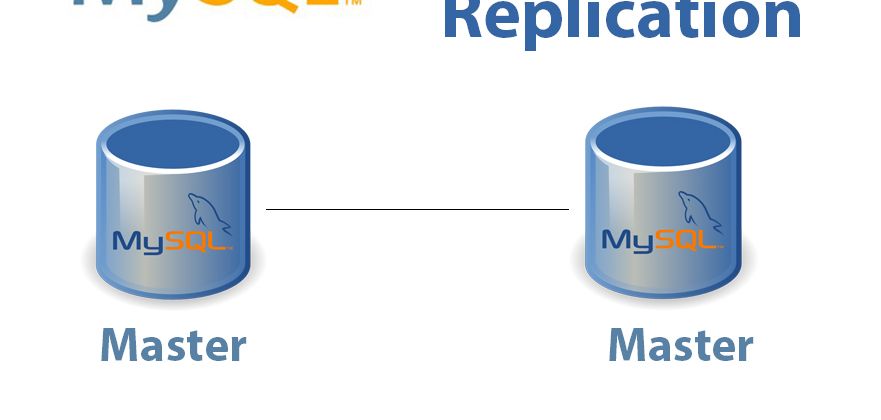
Data replication refers to the process of copying data from one server to another to ensure high data availability and accessibility, thereby making the system fault-tolerant. MySQL leverages master-slave mechanism to achieve replication, allowing users to copy data from their MySQL database (master-server) into one or more MySQL databases (slave-servers).
With data replication in place, MySQL distributes the load over multiple databases & helps access and analyse data seamlessly, thereby making the system fault-tolerant.
In the master-slave mechanism of replication, the data replication takes place as a one-way process, and hence it allows users to copy data only from the master server and store it in the slave-servers. Here, the master server is responsible for carrying out the write operations, whereas the slaves handle the read operations.
Prerequisites
- Working knowledge of MySQL.
- Working knowledge of MySQL Workbench.
- A MySQL database.
- A general idea of data replication.
- A general idea of MySQL commands.
Methods to Replicate MySQL Database
You can easily Replicate your MySQL Database by implementing the following methods:
- Method 1: Using Master-Slave Approach to Replicate MySQL Database
- Method 2: Using Hevo Data to Replicate MySQL Database
Method 1: Using Master-Slave Approach to Replicate MySQL Database
You can use the master-slave mechanism to Replicate MySQL Database using the following steps:
- Step 1: Adjusting Your Source Server’s Firewall
- Step 2: Configuring the Master Server
- Step 3: Creating a Replication User
- Step 4: Configuring the Slave Server
Step 1: Adjusting Your Source Server’s Firewall
Before getting started, you need to configure a firewall on both your servers with UFW. However, the source’s firewall will block connection attempts from the MySQL replica instances. Hence, you need to allow connections from your replica through the source’s firewall. You can do so by including a UFW Rule on your source server.
Running this particular command allows any connections originating from the replica server’s IP address — represented by replica_server_ip — to MySQL’s default port number, 3306:
sudo ufw allow from replica_server_ip to any port 3306
You need to replace replica_server_ip with your replica server’s actual IP address. Upon successful addition, you’ll see the following output:
Rule added
Step 2: Configuring the Master Server
To Replicate MySQL Database effectively, you first need to configure the master server or the primary database. To do this, log in to the master server and open the configuration file, usually found at the following path:
/etc/mysql/my.cnf
Once you’ve opened the file, modify the bind-address of the master server by changing the value to the actual IP address of the master server:
bind-address = 127.0.0.1
to
bind-address = 198.1.12.123
Update the “mysqld” section to notify MySQL about the master server and specify the log-based and other parameters. To do this, open the configuration’s file and update it by adding the following lines code:
Here, new_database is the database that we want to replicate.
Once you’ve made all the necessary changes, you need to restart the MySQL server to bring the changes into effect. You can do this by using the following lines of code:
sudo service mysql restart
Step 3: Creating a Replication User
With the changes now into effect, you need to create a new user with replication privileges, thereby allowing it to perform replication. To do this, open the MySQL shell and execute the following lines of code:
mysql -u root -p
Enter password:
Now, create a slave user for your MySQL database and add a password to help identify it. To do this, you can use the following lines of code:
mysql> CREATE USER ‘slaveuser’@’%’ IDENTIFIED BY ‘PASSWORD’;
With your slave user now set up, provide it with the necessary privileges using the following line of code:
mysql> GRANT REPLICATION SLAVE ON *.* TO 'slaveuser'@'%';
To bring the changes into effect, flush the privileges using the following line of code:
mysql> FLUSH PRIVILEGES;
Check the status of your database and then use the global read lock to lock the tables and prevent any write operations from taking place when the log status capture and backup is occurring. To do this, you can use the following lines of code:
mysql> USE new_database;
mysql> FLUSH TABLES WITH READ LOCK;
mysql> SHOW MASTER STATUS;
You can now use the mysqldump command to replicate the entire master database to the slave server. To do this, you can use the following lines of code:
mysqldump -u root -p new_database> new_database.sql
Enter password:
Once you’ve executed the mysqldump command, a new backup file, known as the “new_database.sql”. Translate this file to the slave server to complete the backup process.
With your back up file now ready, you can now unlock the tables using the following lines of code:

This is how you can configure your master server to Replicate MySQL Database.
Step 4: Configuring the Slave Server
With your master server now ready & configured, you now need to configure the slave server to Replicate MySQL Database successfully. To do this, login to the slave server using your credentials such as username and password, and then create a new database to store the data of the master server using the following lines of code:
mysql -u root -p
Enter password:
mysql> CREATE DATABASE new_database;
mysql> quit;
To transfer the data from the master server, import the backup SQL file into the slave server. You can do this using the following lines of code:
mysql -u root -p new_database < /PATH_TO_new_database.sql
Enter password:
Once you’ve imported the SQL file, you now need to configure the slave server by providing the server details, log file path, etc. To do this, open the configurations file and update the following parameters:
server-id = 2
log_bin = /data/mysql/mysql-bin.log
binlog_do_db = new_database
Once you’ve made all the necessary changes, now restart the slave server to bring the changes into effect. To do this, you can use the following lines of code:
sudo service mysql restart
To complete the MySQL replication process, open a new terminal and update the master-slave configurations as follows:
This is how you can configure the slave server and Replicate MySQL Database successfully.
Method 2: Using Hevo Data to Replicate MySQL Database
Hevo Data, a No-code Data Pipeline, helps you replicate data from MySQL to Data Warehouses, Business Intelligence Tools, or any other destination of your choice in a completely hassle-free & automated manner. Hevo supports data ingestion for replication from MySQL servers via Binary logs (BinLog). A binary log is a collection of log files that records information about data modifications and data object modifications made on a MySQL server instance. Hevo utilizes the Binary logs to perform your MySQL Data Replication.
Check out what makes Hevo amazing:
- Secure: Hevo has a fault-tolerant architecture that ensures that the data is handled in a secure, consistent manner with zero data loss.
- Auto Schema Mapping: Hevo takes away the tedious task of schema management & automatically detects the schema of incoming data from MySQL and replicates it to the destination schema.
- Quick Setup: Hevo with its automated features, can be set up in minimal time. Moreover, with its simple and interactive UI, it is extremely easy for new customers to work on and perform operations.
- Transformations: Hevo provides preload transformations through Python code. It also allows you to run transformation code for each event in the Data Pipelines you set up. You need to edit the event object’s properties received in the transform method as a parameter to carry out the transformation. Hevo also offers drag and drop transformations like Date and Control Functions, JSON, and Event Manipulation to name a few. These can be configured and tested before putting them to use for aggregation.
- Hevo Is Built To Scale: As the number of sources and the volume of your data grows, Hevo scales horizontally, handling millions of records per minute with very little latency.
- Incremental Data Load: Hevo allows the transfer of data that has been modified in real-time. This ensures efficient utilization of bandwidth on both ends.
- Live Support: The Hevo team is available round the clock to extend exceptional support to its customers through chat, email, and support calls.
With continuous real-time data movement, Hevo allows you to replicate your MySQL data along with your other data sources and seamlessly load it to the destination of your choice with a no-code, easy-to-setup interface.
Conclusion
This article teaches you how to Replicate MySQL Database with ease. It provides in-depth knowledge about the concepts behind every step to help you understand and implement them efficiently. While you can use the Master-Slave method to set up MariaDB replication as described in this post, it is quite effort-intensive and requires in-depth technical expertise


Top comments (0)